Showing posts with label pretty. Show all posts

Saturday, 24 May 2014

A Bunch of Roses


Who doesn't love roses? They are an iconic flower, but there is certainly no excuse to dislike them in cake form! 
For years i have marvelled at peoples abilities to ice cupcakes like this, but i have only just got round to trying it out, and i am very pleased i have. So i thought i would give you a quick tutorial on how to create these magnificent blooms for yourselves, which are sure to impress anyone, and are simple once you know how.


I think that one of the reasons i hadn't got round to trying it for so long, is that unfortunately you do need a very specific type of icing nozzle, which probably wouldn't be found in your every day icing set. But once you have bought it, there is no more work involved, and it will last you a lifetime. 
The tip used is the Wilton 2D brand, which I'm sure many bakers would of heard of before. This can be bought on Amazon for about £3.
Wilton 2D Tip


Prep


So for Prep work you will need the cupcakes that you are planning to Frost, these will need to have a reasonably flat top, and you can level them out as you can see i did with mine. 
You will also need your buttercream icing, which you will need to make quite thick, so that the shape of the roses hold, you don't want it to have any wobble if you shake it in the bowl. Colour your icing the desired colour, sticking to actual rose colours will make it look more realistic, and pop into your bag, fixed with the 2D tip.

Tutorial


1.Flatten the top of your cupcake, so you have a level base on which to ice.


2. Place the tip in the centre of the cake, and squeeze a small amount out in an upwards motion, this will be the bud of your cake, and what you wrap your 'petals' around. 

3. Pull your nozzle to the side a bit, and switch from an upwards pull on your icing bag to pulling it tightly around the 'bud', but making sure you don't press your nozzle to close to the cake, let the icing fall out. 


4. Continue pulling round the inner circles in a spiralling motion to form the outer petals, using the same technique. Once you reach the last bit of cake, start pulling up slightly, and slow the flow of icing.


 5. Lift off as you reach the end and smooth down the break with either your finger or a wet paint brush. 


 6. You can now customise your cakes however you wish, maybe some edible pearls in the middle, or leave the icing to dry for a bit and brush the tops of the petals with edible glitter of lustre. 


So there you have it the most delicious bunch of roses you will ever happen to eat! I hope you enjoyed this Tutorial Blog Post and that it has helped you. If you would like me to demonstrate something, please comment below, or use the contact box to the side.
Until next time, Elise xxx

Monday, 5 May 2014

Trifle Cupcakes


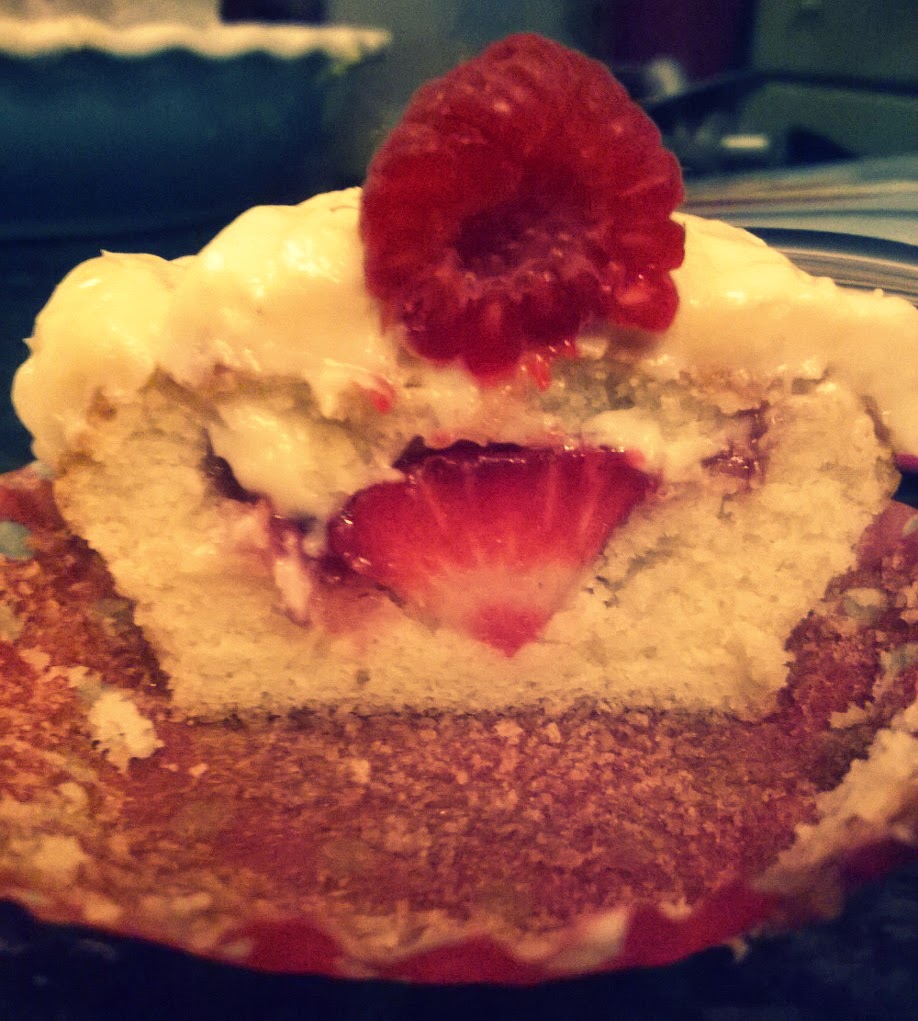
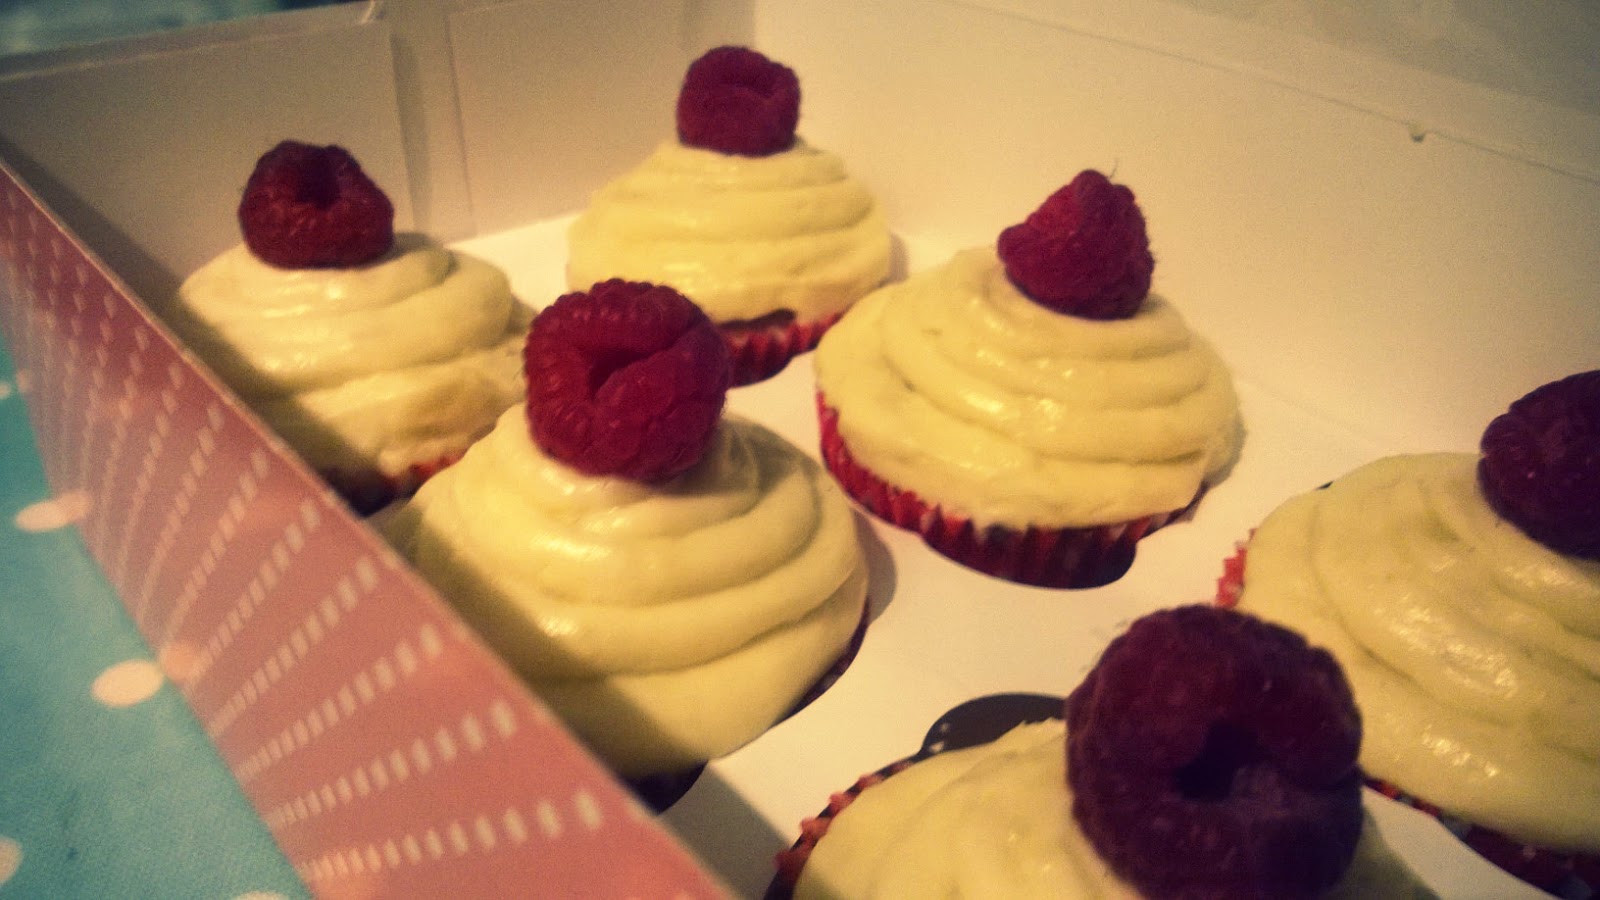
 My Mother has a huge love for custard and since trying these cupcakes has proclaimed them to be her favourite so far! And it really does taste like the trifle pudding that we all know and love, complete with cream, custard, raspberries, and the 'cakey' element, i really think that you will enjoy them, and you will amaze anyone that you make them for as they receive a pocket sized dessert, what more could you want in life!  


This may seem a little complex, because of the creme patisserie element to the recipe, but this is a full proof recipe and is bound to turn out perfect, just don't panic, and keep mixing, and don't be afraid to add more fluid if it seems a bit too thick! 

Makes 12-16 cupcakes

Ingredients: 

Sponge- 

80g butter 
280g caster sugar 
240g plain flour 
1 tbsp baking powder 
1/4 tsp salt 
240ml whole milk 
1 tsp vanilla essence 
2 large eggs 

Filling and Frosting- 

500ml whole milk 
1/2 tsp vanilla essence 
5 egg yolks 
100g caster sugar 
30g plain flour 
30g cornflour 
200ml double cream 
12-16 raspberries 
12-16 strawberries 
100g raspberry jam 

(I know this recipe calls for a lot of ingredients, but trust me, it's worth it) 


Method: 

1.Preheat oven to 190c, gas mark 5, prepare muffin tin.
2.Beat together the butter, sugar, flour, baking powder and salt on a low speed until they are all mixed and resemble fine breadcrumbs.
3.In a jug whisk together the milk, vanilla and eggs, then pour 3/4 into the dry ingredients, and mix on a low speed. Once it is incorporated, add the rest of the milk, and mix until you get a smooth batter.
4.Divide the batter between the muffin cases, filling each case two thirds full, then bake for 18-20 minutes, until the sponge bounces back when lightly pressed. Leave to become completely cool.
5.Whilst the cakes are cooling make the creme patisserie. Place milk, and vanilla in saucepan and bring to boil. In a bowl mix together the egg yolks, sugar, flour and cornflour to make a paste (you may want to add a couple of tablespoons of hot milk to thin)
6.When the milk has boiled, remove pan from the heat and mix 4-5 tablespoons with the egg mix. Then pour this into the milk in the pan, and return to the heat, bring back to the boil whisking constantly once boiling cook for a further minute to cook the flours.
7.Once the custard has thickened, pour onto a baking tray and cover in cling film to cool. 
8.Tip the cooled custard into a large bowl, and beat with a wooden spoon. In a separate bowl whip the double cream  into soft peaks, then fold this into the custard.
9.Hollow out all of the cupcakes, keeping the cut-out pieces of sponge.
10.Place a piece of strawberry in the cupcake, followed by 1/2 teaspoon of jam on top, and then top up with the custard mix (which i prefer to pipe in).
11.Repeat this for all the cupcakes, then replace the sponge, trimming to fit as a lid. Finish off the cupcakes by piping some of the custard mixture on top, add a raspberry on top of the swirled custard to finish.


And thats it! I hope you enjoy them, and with summer fast approaching, and all this glorious british fruit coming into season, i implore you to take up the opportunity and use it! I will be giving you many more recipes for what you can do with our produce in the future too, as i think it's far too good to be wasted! 

P.s. I thought i would give you a quick Bo update too, who is now 18 weeks old and getting on very well indeed!  


 Also, if any of you have any requests of things you would like to see me make, perhaps a favourite dessert compacted into a cupcake like this recipe, then don't hesitate to use the contact box to the left of the screen or comment below, i will greatly enjoy reading any suggestions. 
Until next time, Elise xxx

Monday, 24 March 2014

Doggy Delights


Hello! Well anyone who read my last post will know that i was getting a puppy, and today she is making her online debut! 
We got her a couple of weeks ago and she is now about 11 weeks old, and i will tell you a little about her. 
She is a Boxador, part Boxer, part Labrador, with the agility and enthusiasm of a Boxer and the intelligence and kindness of a Lab, and i also think it makes for a pretty adorable dog. 
Her name is Bowline, which is a type of knot, and this stems from the fact that our family owns and loves boats, but we shorten it to Bo, which is uber cute. 
She loves to play, and is very intelligent, and has learnt so many tricks, so much so that we have just about managed to train her to lift her left paw when we say port and her right when we say starboard ( all tying in with the nautical stuff )


I have never owned a dog before, but all i know is that i am loving her and the experience so far, and i am especially going to enjoy finding recipes to bake her little treats, and training her to be my co-chef, or at least a dog that doesn't jump on the work surface every time i'm baking, either would do. 


So to celebrate the arrival of the lovely Bo, i have found a recipe on pinterest, which isn't mine, but i thought looked lovely, this recipe is from a website called pizzazzerie.com and has lots of lovely recipes on it. So i hope any dog lovers enjoy this recipe, and watch my blog for any more appearances of Bo, she might be sneaking into a few more of my posts from now on.


 Pupcakes
Makes 6 cupcakes 
Ingredients
1 cup whole-wheat flour 
1 tsp baking powder

1/4 tsp baking soda

1/4 c plain yogurt
2 1/2 tablespoons sunflower oil
2 tbsp honey
1 large egg
1/2 apple, chopped
1/2 cup grated cheddar cheese
1/4 cup diced carrot

Frosting

8 ounces cream cheese, room temperature

2 tablespoons honey

2 tablespoons peanut butter

Method
1.Preheat the oven to 350 degrees F. Line muffin tins with 6 paper liners. 
2.In a large bowl, combine flour, baking powder and soda. In a medium bowl, blend together the yogurt, oil, honey and eggs, then stir in the apple, cheese, and carrots. Add to the flour mixture and stir just until mixed (will be slightly lumpy).
3.Spoon the batter into the muffin tins, filling each cup about 3/4 full. 
4.Bake in the preheated oven about 15-20 minutes or until a toothpick inserted into the center of a pupcake comes out clean. Let the pupcakes cool in the tins on a rack for a few mintues, then remove and set aside to cool completely. 

5.For the frosting, just mix together all of the ingredients and pipe it on top, and serve it to your helpful hound or marvellous mutt!


Hope you and your pooches enjoy this!
See you next time, love from Elise and Bo xx

Thursday, 20 February 2014

Woodland Birthday Cake


Here it is! The woodland themed birthday cake i made for my little sisters birthday! It fitted in well with her indoor camp style birthday party, and was enjoyed by a crowd of 9 year olds! 


Well first of all Happy Birthday to my Little sister Tibbie, and secondly i've decided that from now on, i will not post a how-to on these sorts of fondant cakes, as it is a lot of hassle and i often find it easier just to look at these sorts of pictures and take inspiration from it. 


So please feel free to take all the inspiration you need, and if you want to make this cake then look at my earlier birthday beach hut cake for a recipe, and comment for any help! 
So thanks again for reading my little post, i have been working on my blog a lot recently trying to get it up and going, and marina has been taking care of this lovely web design. Thank you to all my new followers, i have a Facebook page, follow me here - https://www.facebook.com/littlegingerbakes and my twitter, shown in the bar on the right hand side of my blog, and help me on my way! 
Thank you, any questions, or comments, feel free to ask! Until next time, Elise xxx


Thursday, 13 February 2014

Beetroot and Chocolate Red Velvet Cake


I had never heard of this cake before until my friend Marina (check out her fashion blog by the way it's great marina-simone.blogspot.com) requested it for her birthday cake.

I researched a bit and came up with this, i put loads of elements together, and excuse the slapdash icing job, but i can honestly say it's amazing! 

With a not-to-rich chocolatey taste, and a lovely earthy back note from the beetroot, and a lovely pinky, ruby colour!

Now as you can see i made a mahoosive cake, which was about 5 layers, so don't worry I'm not going to make you make that much, just giving you the recipe to make an average to large sized cake. 

Even better, it's a very simple cake to make!


Ingredients

For the Cake 


2 teaspoons lemon juice
135g beetroot, boiled and blended (reserve some for swirling on top)
310g plain flour
1 teaspoon salt
2 teaspoons bicarbonate of soda
400g caster sugar
50g unsweetened cocoa powder
285g unsalted butter, melted
4 eggs, beaten
125ml milk
2 teaspoons vanilla extract

For the Cream Cheese Frosting

75g cream cheese
1 teaspoon vanilla extract
450g icing sugar


Method


1.Grease and line one 23x33cm, similar sized baking dish or a couple of sandwich tins.  Preheat oven to 180 C / Gas 4.

2. Sprinkle the lemon juice over beetroot, and set aside. 

3. Combine the flour, salt, bicarbonate of soda, caster sugar, cocoa, melted butter, eggs, milk and 2 teaspoons vanilla in a large mixing bowl. Stir in beetroot. Beat 2 minutes at medium speed of mixer, until well combined, but do not over mix. Pour into your prepared dish. 

4. Bake at 180 C / Gas 4 for about 40 minutes or until a skewer comes out clean. Leave on wire rack, and allow to cool (stone cold) 

5. To make the icing- : combine cream and cream cheese, 1 teaspoon vanilla. Add icing sugar, beat until fluffy.  

6. Once your cake is cooled, using a palette knife, spread your frosting evenly all over the top and the sides of your cake. 

7. Finally using a knife or a pastry brush, make a swirl or any other pattern of your choice, on top of your cake, using your reserved beetroot puree. 


And there you have it! Beetroot and chocolate red velvet cake! i hope you enjoy this recipe, please do comment if you like the look of this recipe, want to make it, or need any help! And don't forget to go check out Marina's blog!  Always here! elise xx